This tutorial probably can be done in PSP 6 but I am now using only PSP 7 so all tutorials will be for 7. The purpose of this tutorial is to get you started with coloring line art images. Once you do one you will get your own ideas. I have only given directions for using tools that come with PSP7. Remember to experiment with your plug in filters you may have.
 This
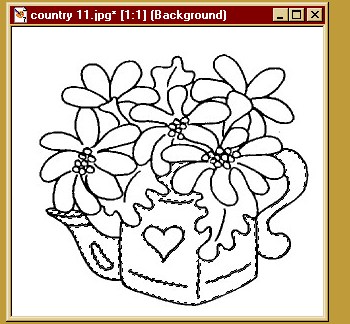
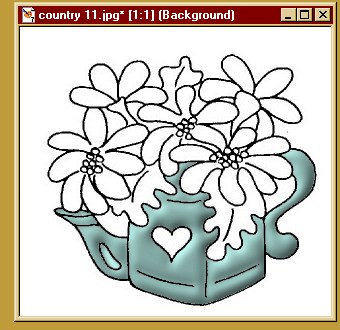
is the image we are going to use to color. To save it right click on the
image and save as.
This
is the image we are going to use to color. To save it right click on the
image and save as.
Open your image in PSP 7.
Double check to make sure that it is in 16 million colors.
The first thing you want to do is, zoom in on the image and carefully examine it for any gaps in the lines. If you will notice just by just looking at this image here the flower stem above the spout of the teapot.. (it has four petals and a stem) end before it touches the petal of the flower below it. If the area missing a little piece of line is going to be the same color as whatever it opens up to, (like the petals of the flowers) you don't need to worry about it. With your paint brush tool, foreground color is set on black.. and the brush size at one fill in the little gaps one pixel at a time. To double check that you have it all filled in, click on different areas of what will be the background with the magic wand and make sure that the marquee doesn't show up in the coloring area of the image any where.
Ok now
we are ready to color.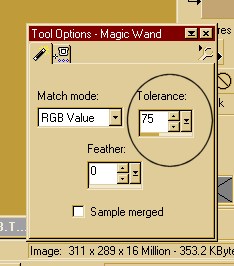
Lets start with the teapot.. using the magic wand, set the tolerance up to 75.
Select all the area's of the teapot by holding down the shift key at the same time you are clicking on the areas of the teapot.. do not select the heart.
You're image will now look like this.
Now go to the color palette and pick a color for the teapot.
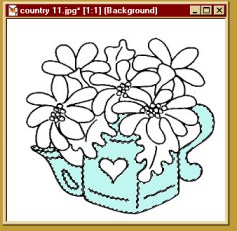 Using
the flood fill tool.. fill in all the selected areas. Your image will
look like this now.
Using
the flood fill tool.. fill in all the selected areas. Your image will
look like this now.
Using the magic wand again and the shift key, select that little area of the inside of the spout and the "shine" area on the spout.
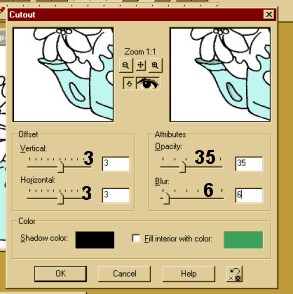
With these two areas selected, to to effects/ 3D effects and cutout. Use the settings shown in the image. **NOTE: these settings do not hold for every image, you will need to experiment with your own images.
After applying the cutout, right click on the image to deselect. Using the magic wand and the shift key again select the rest of the areas of the teapot that have been colored. With these areas selected, go to Effects/3D effects and inner bevel. Play with the presets and settings until you get it how you want. I used the Pillow preset and all the default settings.
Select the heart and flood fill with a color of your choice and use the inner bevel on it too.

Now using the magic wand and shift key, select all the leaves and stems. Select a color for your leaves.
Going to textures on the color palette, click and hold on the little arrow next the the "no sign" A little box will pop up (by the way.. try it on the styles boxes too, this is where you change to gradients, textures etc.) click on the textures square. The textures will now appear in the first textures box (this is for the foreground color). Click on the textures box and another window will pop up.. scroll through and pick a texture to apply to your leaves. Once you have one picked flood fill each of your leaves. If you don't like a texture, undo it and play until you find one you like.
Then apply the inner bevel to the leaves.
Repeat these steps for the petals of the flowers.
To do the centers of the flowers use the same steps also but zoom in on the image to make it easier to select the little circles. Resize the image slightly smaller than what it is, this helps to hide any little areas you might have missed or little mistakes.
You have now colored your first image. Experiment, let your imagination run wild!!! And have fun!!!!

© Nanette Hubenschmidt 2001
This
site ©Copyrighted 2000 - 2003
Downhome
Stationery Newsgroup and Its Contributing
Members
All Rights Reserved Worldwide.